Pole lathe turning is a type of woodworking that allows you to create stunning, long-lasting pieces and take your craftsman skills to the next level. With a few easy tips, start creating breathtaking works of art by learning how to use a pole lathe.
Understanding the Basics of Pole Lathe Turning
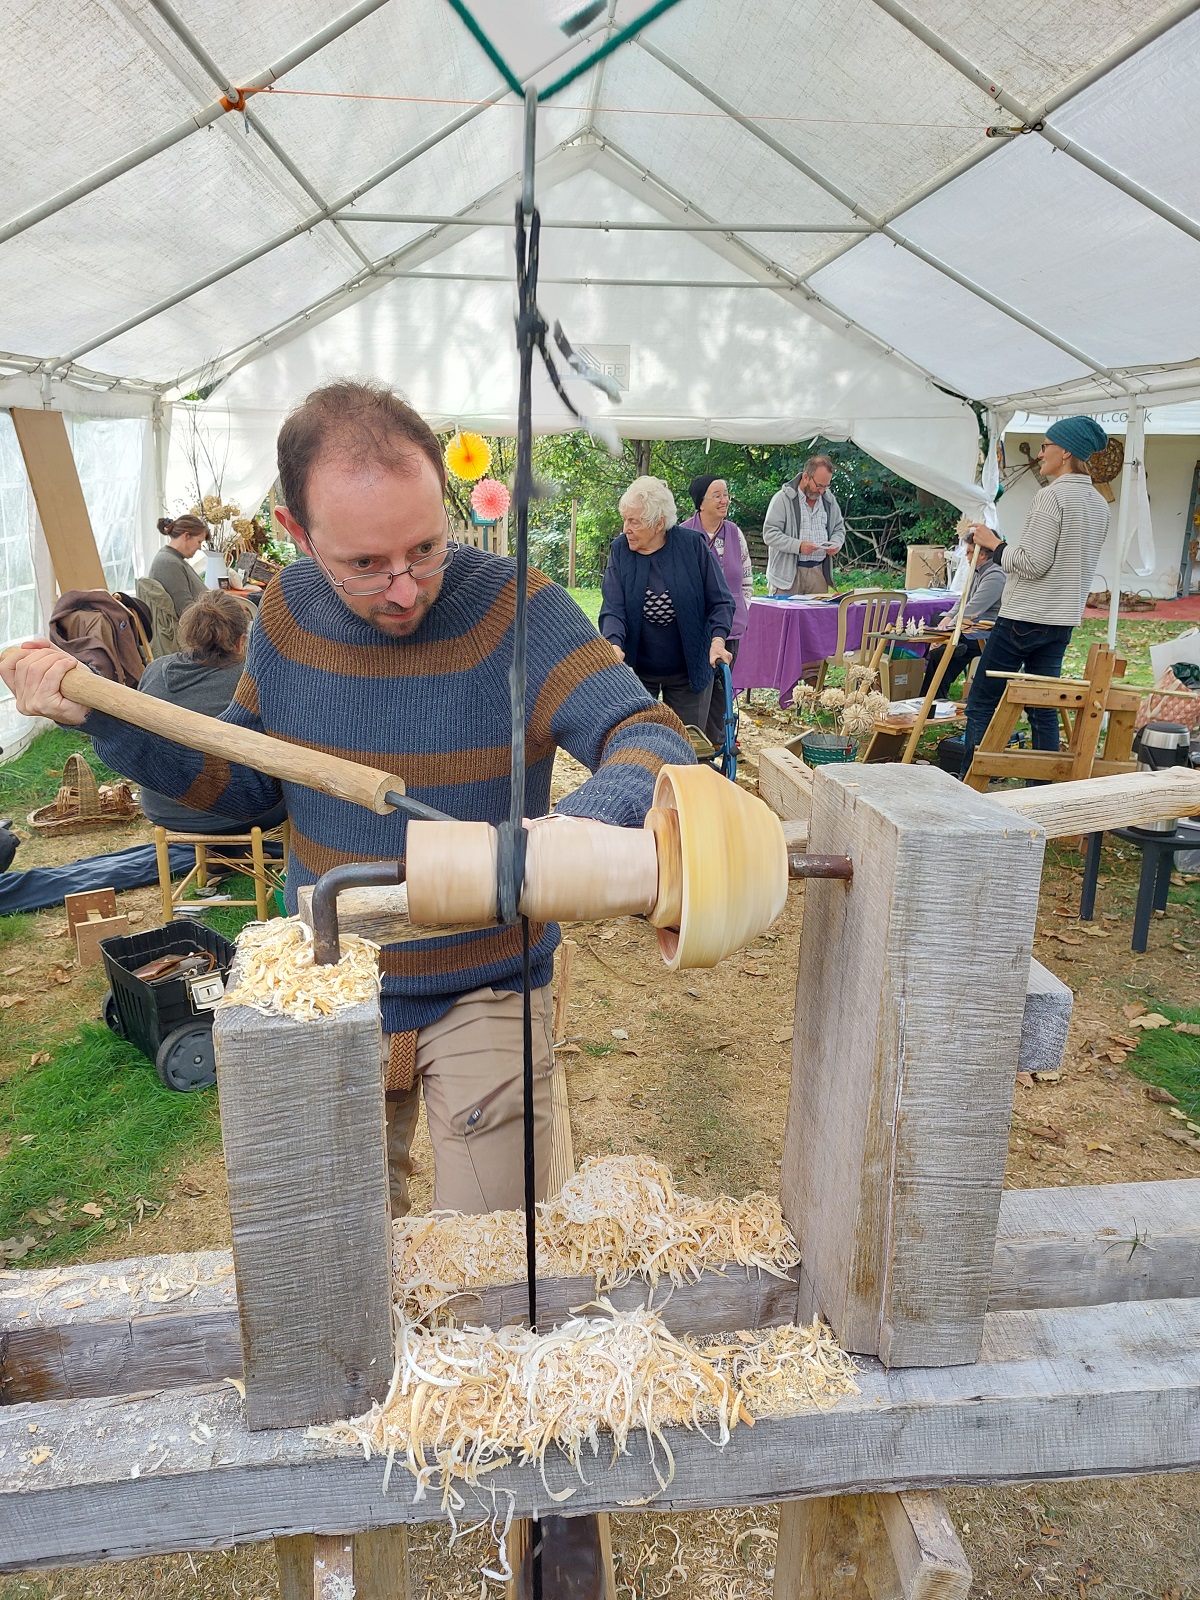
To begin pole lathe turning, you will need several essential items. Most importantly, you need a pole lathe consisting of a wooden lathe bed, poppets or head and tailstock, legs, treadle, and rope attached to the pole. Instead of using a pole, I opted for a modern approach and used a bungee cord.
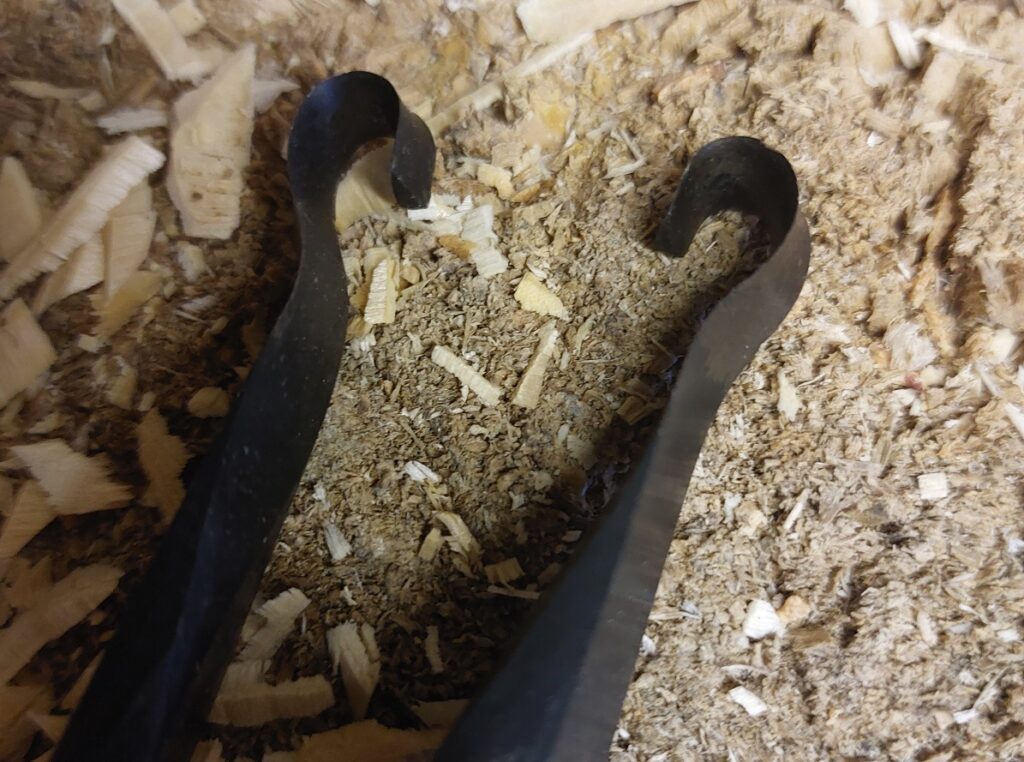
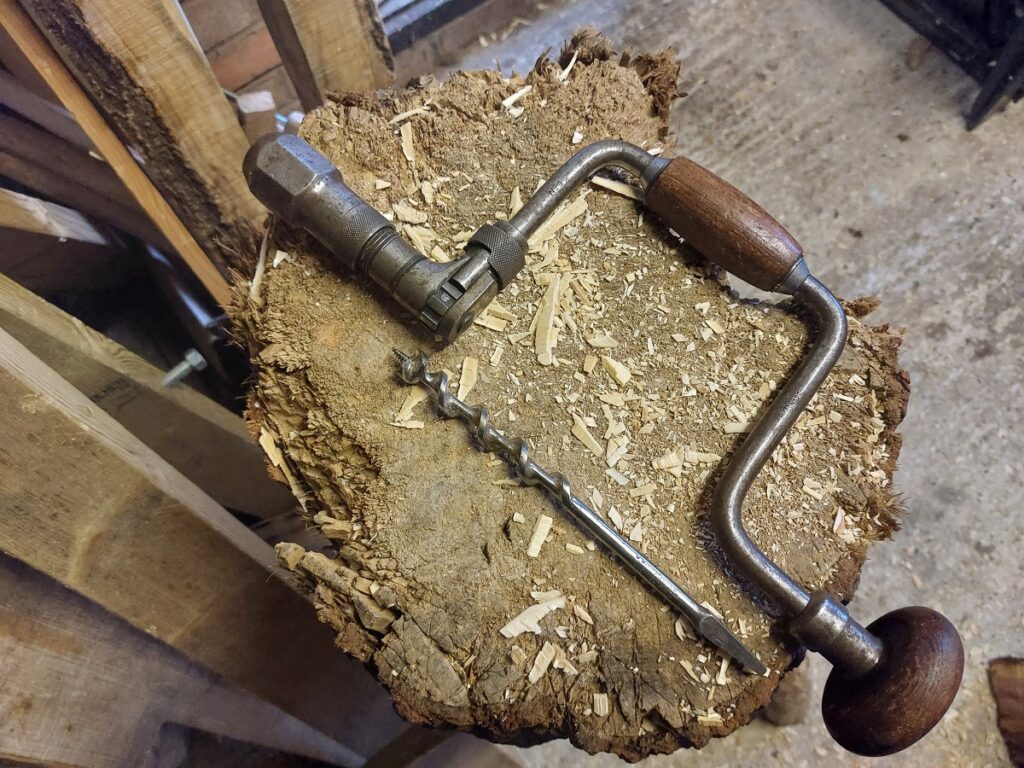
You also need specialist tools called hook tools. They come in a variety of shapes and sizes. However, the most common setup includes a hook-up and a hook-down tool. In addition, you will also need a sturdy chopping block, wedges or froe, a maul, an axe, a brace and bit, and a mandrel.
Tip-up & tip-down hook tools
It is possible to turn a bowl using a single hook. My preference is the tip-up hook. However, having both tools is best for easier access throughout the project. Knowing when to use which hook comes with experience. However, in broad terms, the tip-down tool is used when working the core of the bowl when you are hollowing out the centre. The tip-up tool is my preferred hook to work on the bowl’s rim.
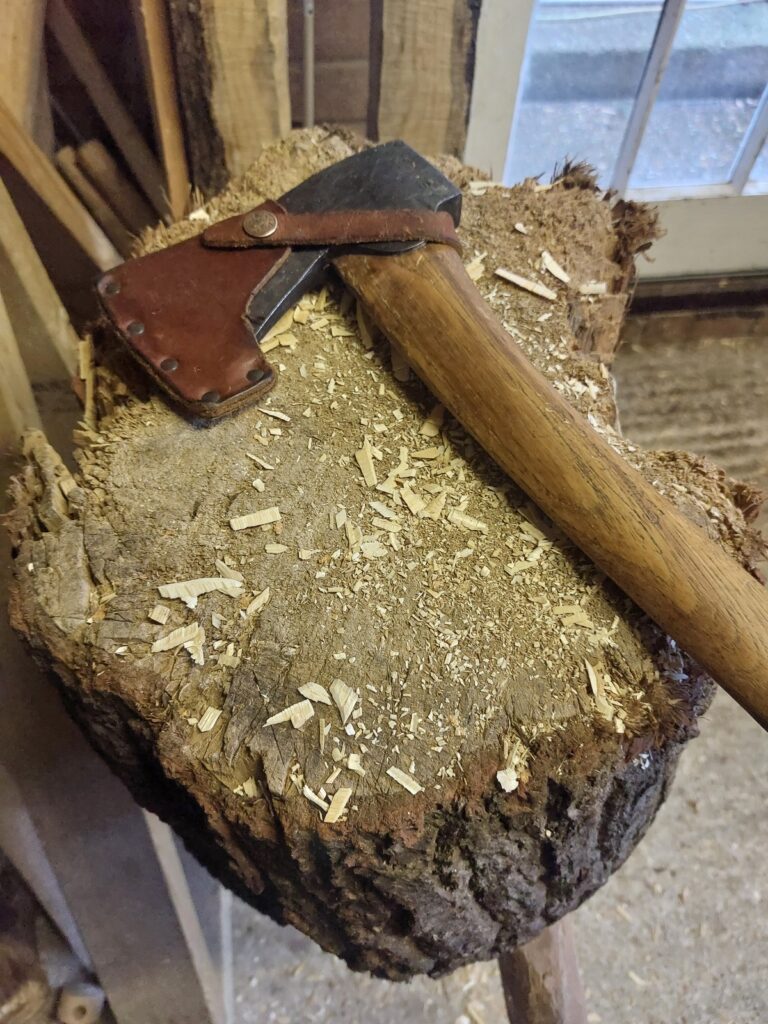
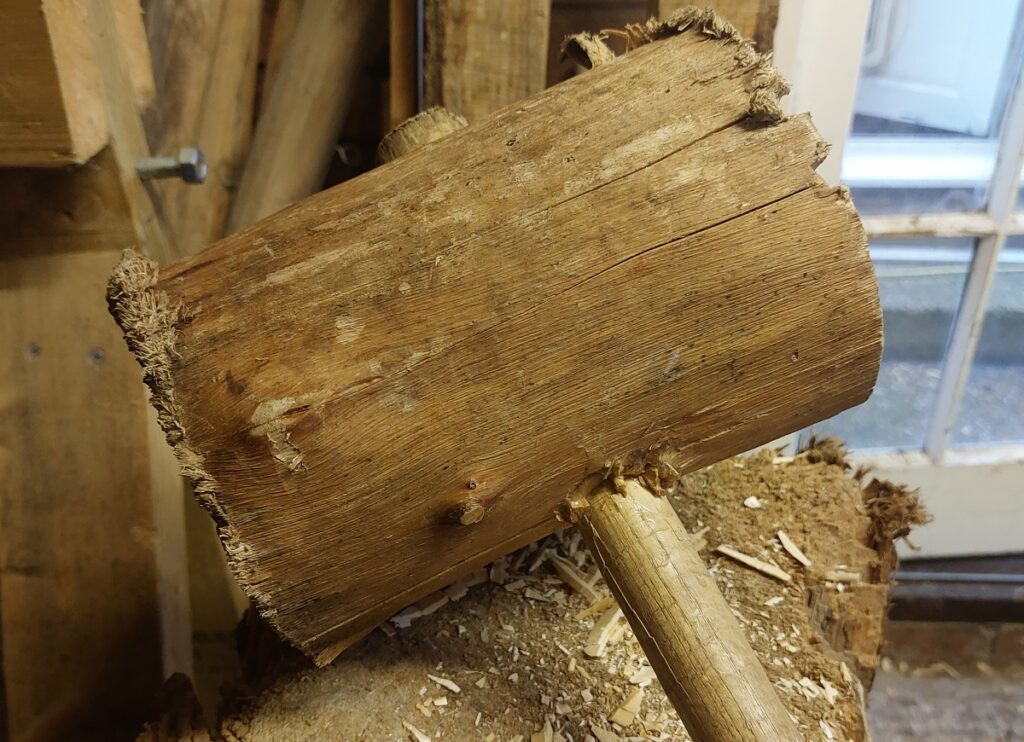
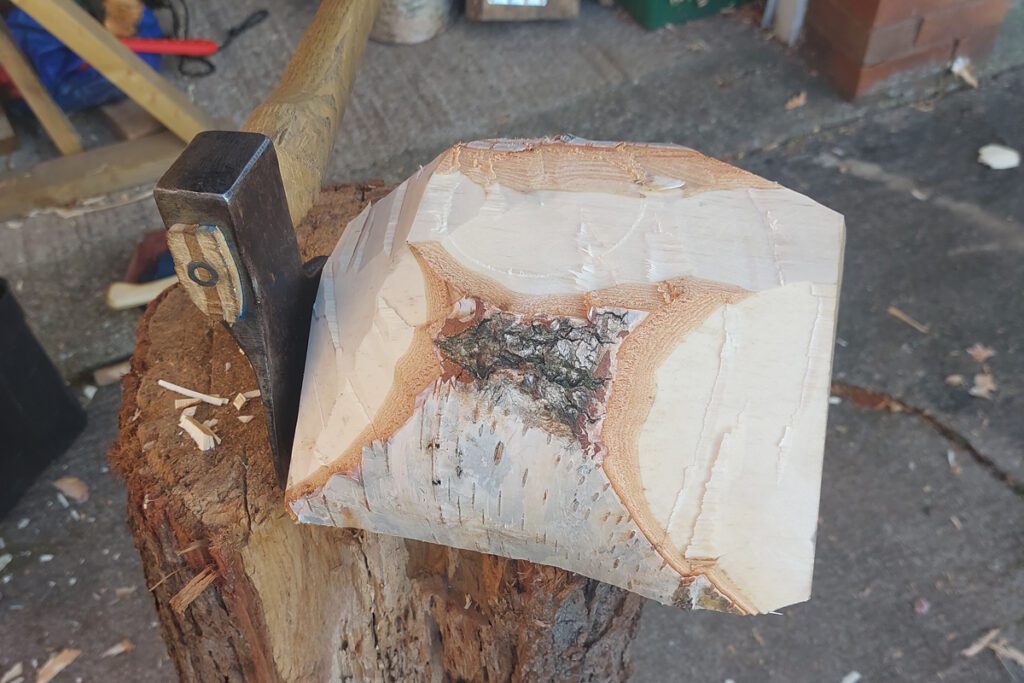
Axe & Chopping Block
The axe and chopping block are used to turn the split wooden log into a bowl blank. When using an axe, you must ensure your body position is to one side of the block and that your hand is never close to the axe blade or where the axe will strike the work. This reduces the chance of serious injury.
Wedges or a froe
Most greenwood projects involve splitting a log through its centre. This is to reduce the chance of the work splitting as it dries. Either metal wedges or a froe can be used for splitting.
A maul
This is a large bit of wood on a handle. It’s used to strike wedges or a froe without damaging the tools being hit. Please do not use a metal hammer as it could result in metal chips which can cause an injury.
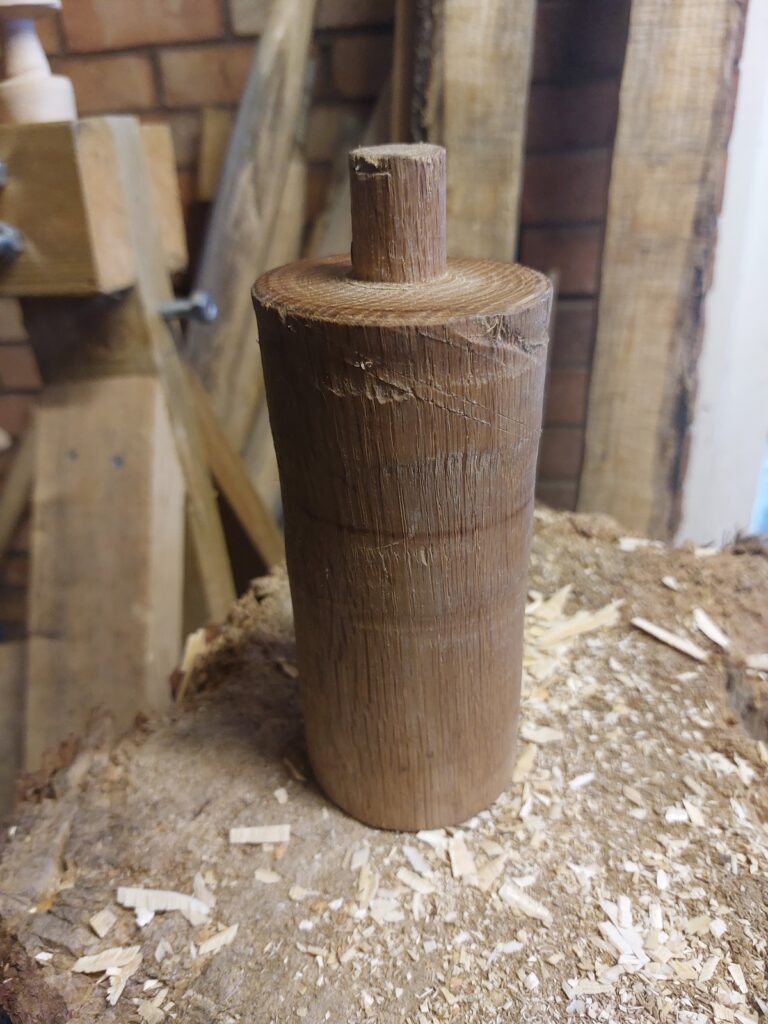
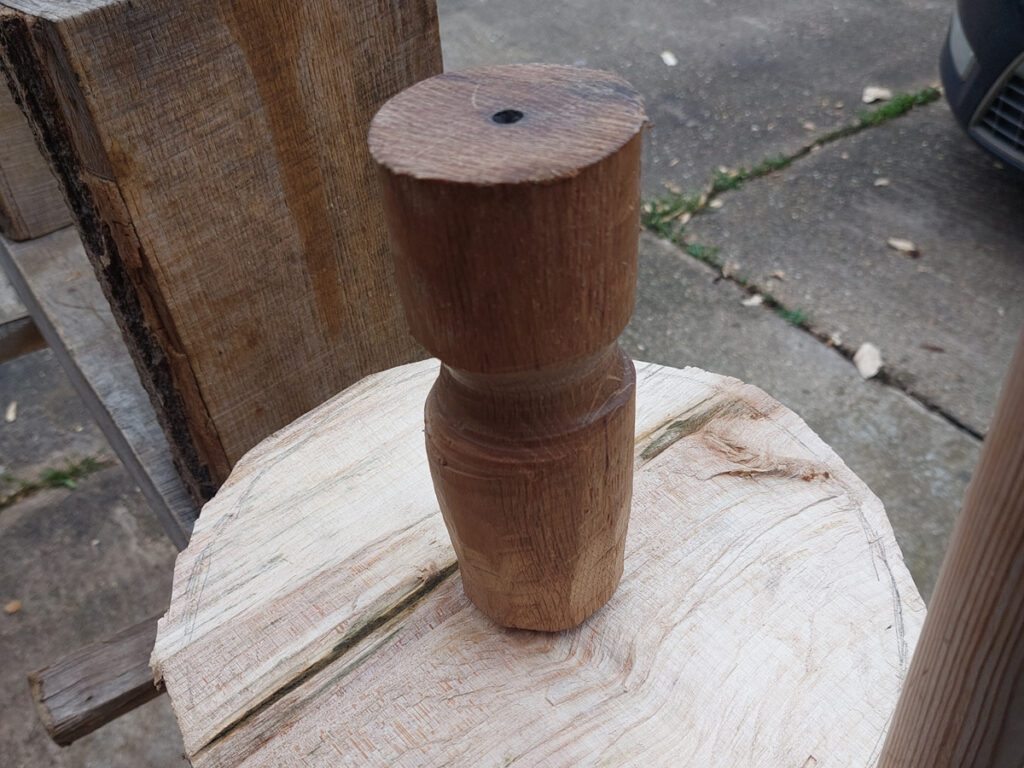
Mandrel
A mandrel is a cylindrical piece of wood attached to the bowl blank and, in conjunction with the rope, is used to turn the work. I use a tenon and mortice style mandrel. The tenon on the mandrel is jam fitted into a pre-drilled hole in the bowl blank.
Brace & bit
Whilst holding the bowl blank firmly, the brace and bit are used to drill a hole into the bowl blank so that the mandrel can be attached to the bowl blank.
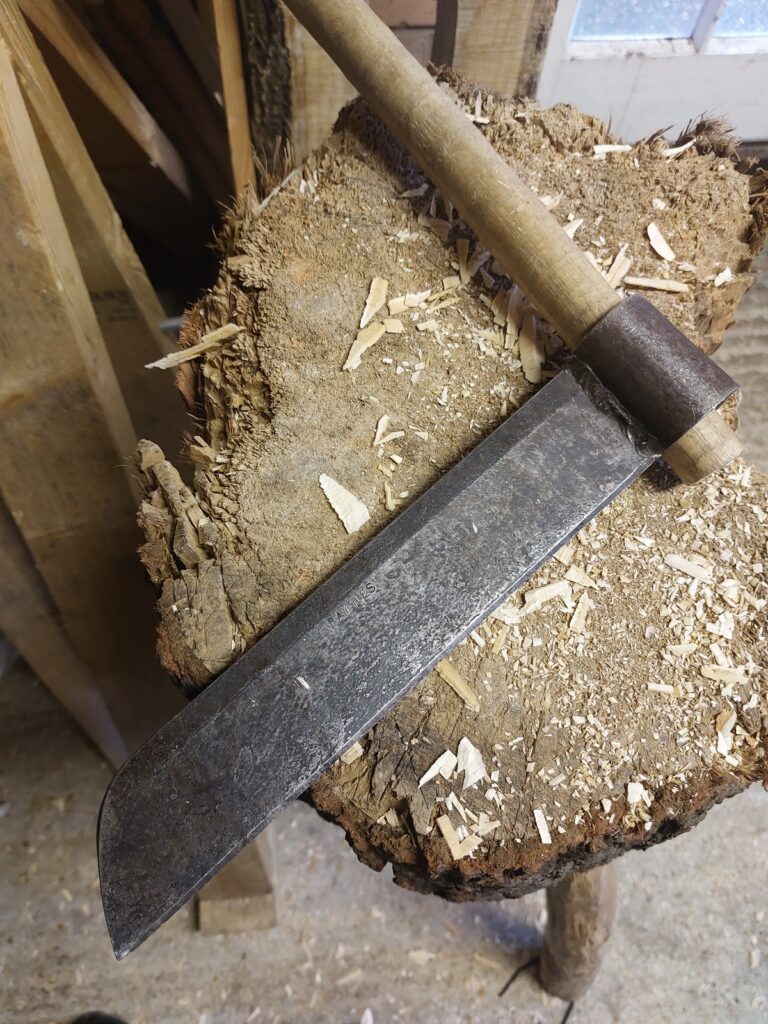
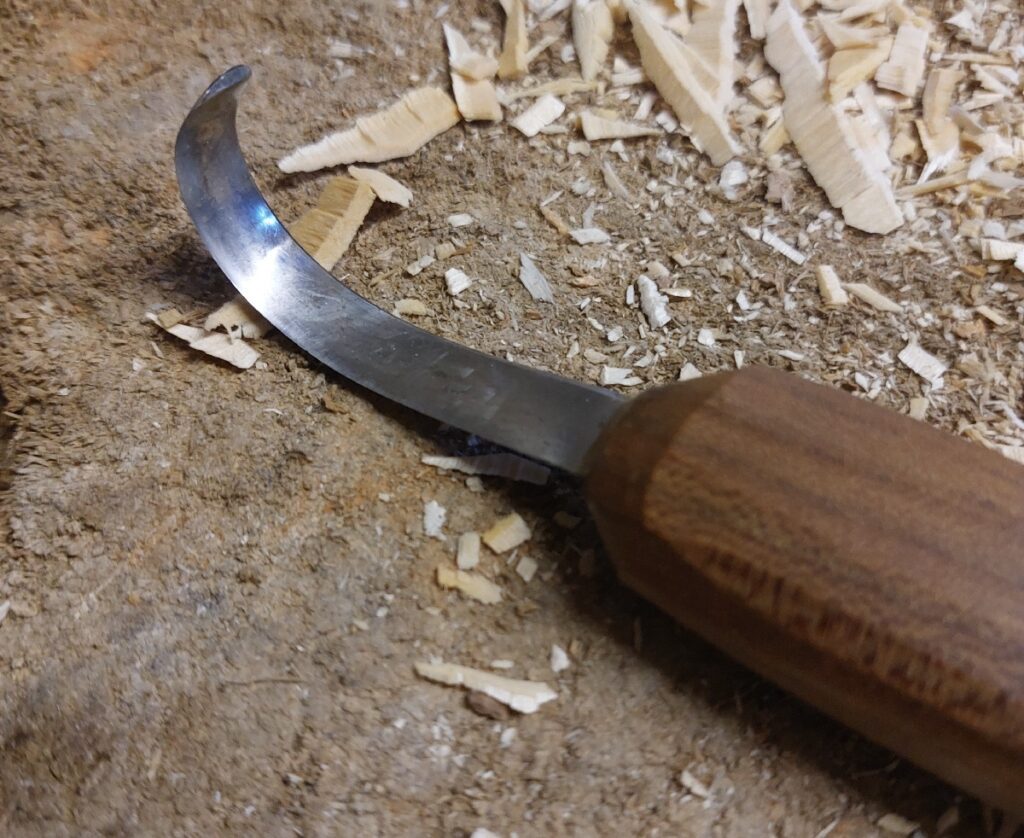
Spoon Knife
A spoon knife removes the nubbins of wood left where the metalwork in the headstock and tailstock held the work.
Choosing the Right Materials and Tools
Before beginning your pole lathe project, you must select suitable materials and tools. Choose timber with an even grain and avoid knotty or resinous wood, as these can make turning difficult. Generally speaking, hardwoods are preferred for bowl turning as the wood is less resinous than pine. In addition, wood for turning on a pole lathe must be green or recently cut down. This is due to wood’s characteristics. When green, wood is relatively soft and hardens as it dries, making it much harder to work with hand tools.
Making the Bowl Blank
A bowl blank is the wood that has had some work to make it suitable for mounting on the lathe. Here are the steps involved in making a bowl blank.
Find a suitable log.
If you want to make an 8″ diameter bowl, your log must be at least 9 inches across. Cut the log so you have a cylindrical piece of wood 9″ by 9″.
Split the log
The log needs to be split through the centre. To do this, strike the wedges or froe with your maul.
Scribe a circle for the bowl’s rim
Select which side you want for the bowl’s rim. Usually, this will be the side opposite the bark. Then, with a scribe/compass, mark a circle at the diameter you want for the bowl.
Mark up the base
On the other side of the blank, you must mark the base. First, find the centre on the bottom to match the circle’s centre on the face. Now draw a circle between 2 and 3 inches in diameter. This is a visual guide you will use when axing the blank out.
Axe work
Now it’s time to start removing waste material. To do this, position the bowl blank bottom up. Next, tilt the work to roughly 45 degrees. Then, with your axe, strike down to remove the corner of the bowl blank. Complete this for each of the four corners. You will notice that you have created slopes that meet at a high point. You will also have to remove these high points. The goal is to end up with a round, dome shape.
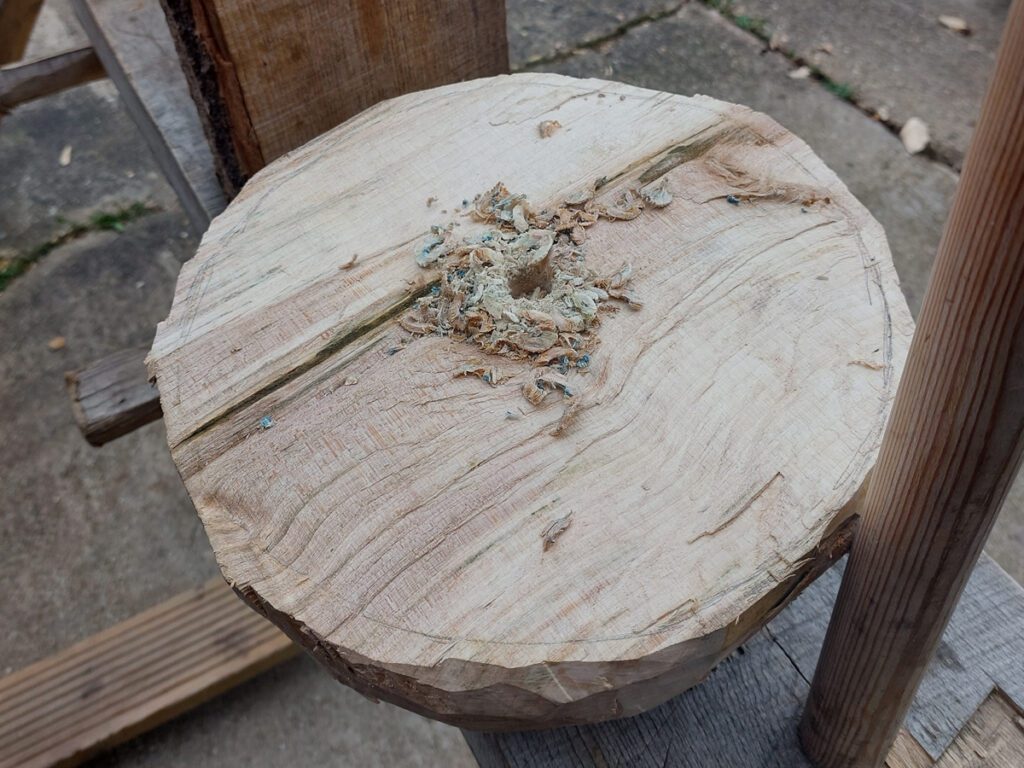
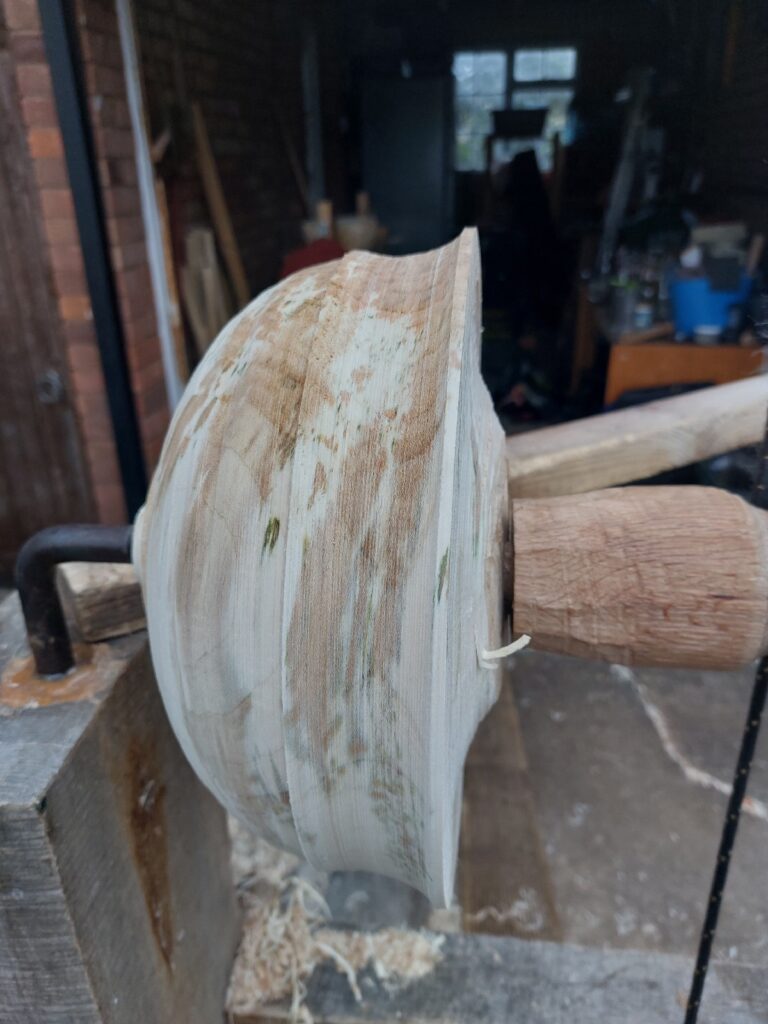
Attaching the mandrel
Once the blank is completed, the next step is attaching the mandrel. First, secure the blank, so it doesn’t wobble. Then drill a hole in the centre of the bowl. The hole should be very slightly smaller in diameter than the tenon on your mandrel. For example, if your mandrel has a tenon with an 18mm tenon, then the hole should be 16/17mm. This will stop the mandrel from moving when you are turning the bowl. Next, bash the mandrel so the tenon fits in the hole. Your bowl blank is now ready to go onto the pole lathe.
Preparing your pole lathe
Setting up a pole lathe is simple if you remember a few vital tips:
- The lathe must be level
- All parts of the lathe need to be tight
- You must have plenty of space
When turning, it’s best to keep people at least 2 metres away. This reduces the chance of injury if the bowl comes off the lathe.
Pole Lathe Turning, Shaping and Finishing Techniques
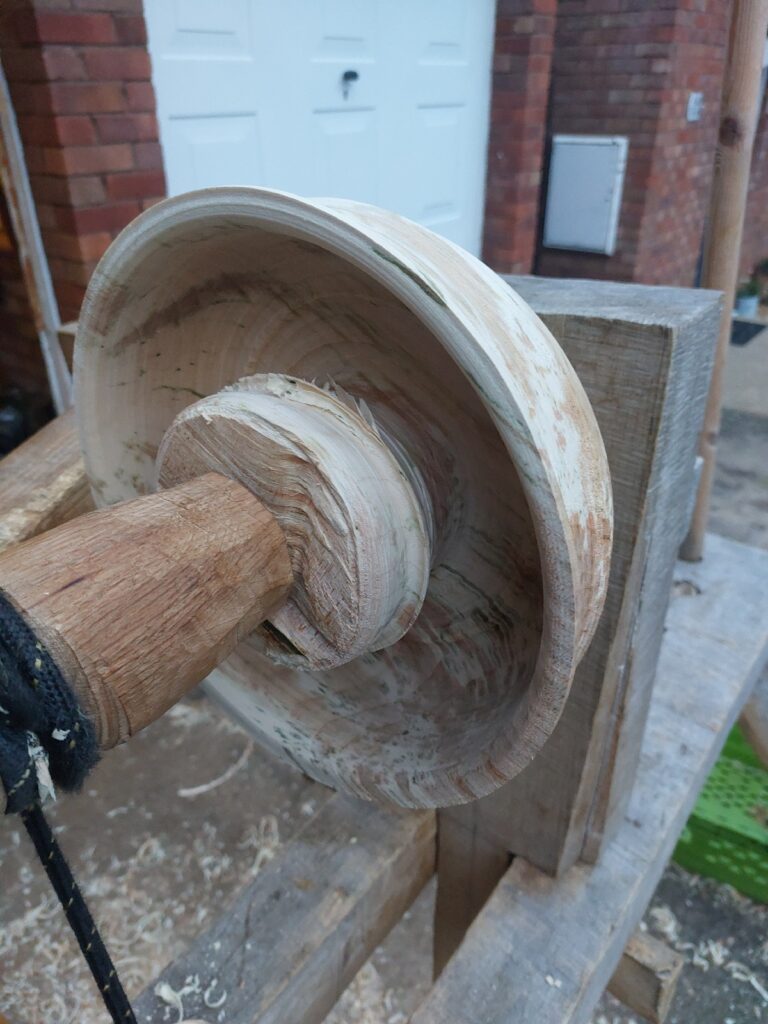
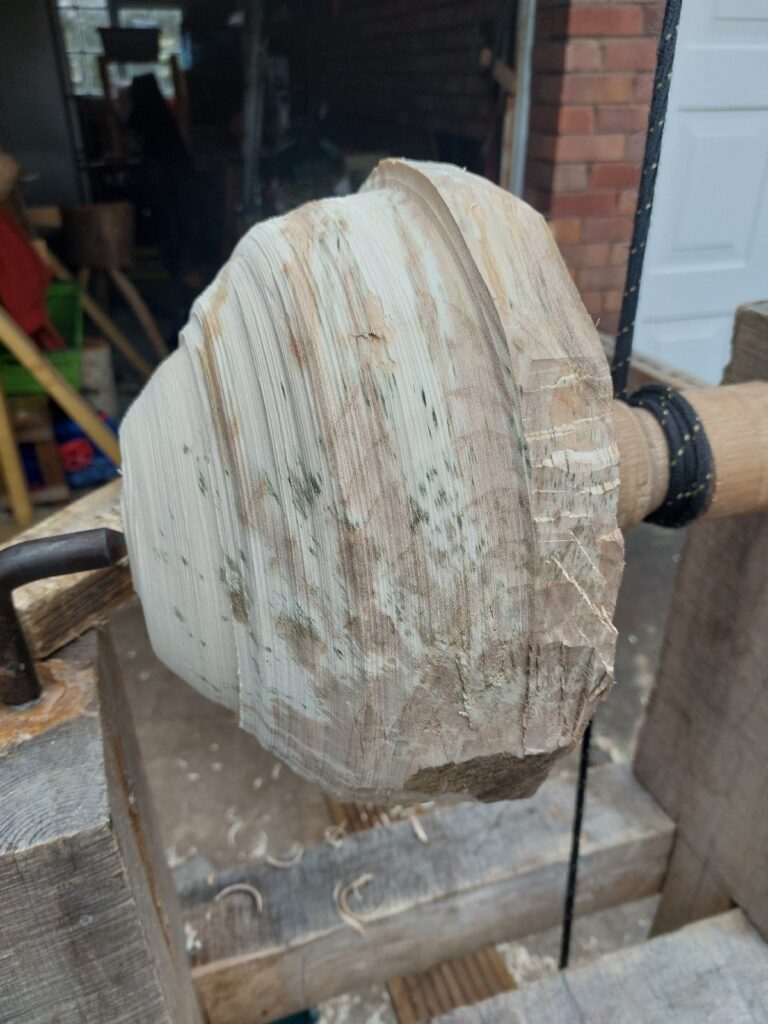
When I start working on a bowl, I start on the outside of the bowl:
- Remove high spots until a consistent surface is created
- Shape the foot of the bowl.
- Create the outside edge of the bowl’s rim
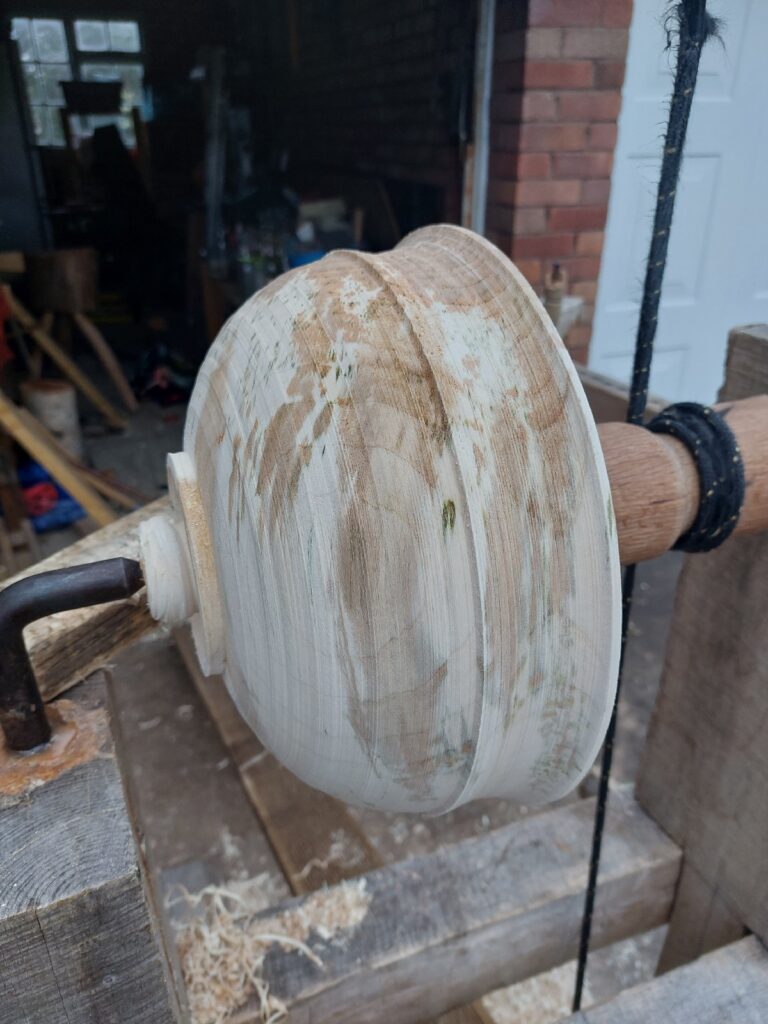
Once the outside is complete, the work is flipped over in the lathe. This gives me access to the side of the bowl that needs hollowing out. This is where having tip-up and tip-down tools help. Starting with the tip-down tool, I can create a cut from the centre parallel to the mandrel. This cut is then pushed towards the rim of the bowl.
The tip-up hook is used to complete the bowl’s rim. This is one of the more difficult cuts, as the tool doesn’t have a groove to run in.
The process of hollowing the bowl continues until the core is ready to snap off the base of the bowl. This leaves a nubbin of wood where the metal in the poppets held the bowl. These nubbins can be removed using a spoon knife or bent gouge.
Drying your wooden bowl
You must allow your bowl to dry slowly. Follow these tips to reduce the chance of your bowl cracking:
- Keep your bowl somewhere dry and cool
- Put shavings into your bowl
- Put your bowl in a paper bag
The bowl should be dried somewhere cool and dry. A garage is ideal. The process can be slowed further by putting shavings into the bowl and keeping the bowl in a paper bag. You should check on the bowl daily – this allows any moisture trapped in the bag to escape.
Oiling your wooden bowl
Use a food-safe drying oil to bring out the best of your bowl’s appearance. Drying oils include:
- Cold-pressed linseed oil
- Walnut oil
- Tung oil
You should avoid non-drying oils such as olive or vegetable oil as there is a chance they will spoil, leaving your bowl with a nasty smell.
Troubleshooting Tips for Common Pole Lathe Turning Problems
One of the most important tips to remember when using a pole lathe is to troubleshoot any problems you might encounter. Common issues include:
- Blunt tools
- Loose poppets
- Loose mandrel
- High pitched whistle
By far, the most common issue beginners have, is blunt hook tools. However, learning how to sharpen them is worth it, as you will need to sharpen your tools before and during every session.
You should also check that your bowl is held securely. If you notice any movement in the poppets or the mandrel wobbles between the centres, your bowl’s finish will suffer. To correct this, check often and tighten as needed.
You may get a high-pitched whistle caused by the friction between the wood and metal of the head and tail stock. To stop this, use a little oil or beeswax on the tips of the metal centres.
If You Need Help with your Pole Lathe Turning
I offer greenwood bowl-turning lessons, either in small groups or 1-2-1 lessons. Please get in touch with me for details on the 1-2-1 courses, and you can see the dates for my group lessons here.