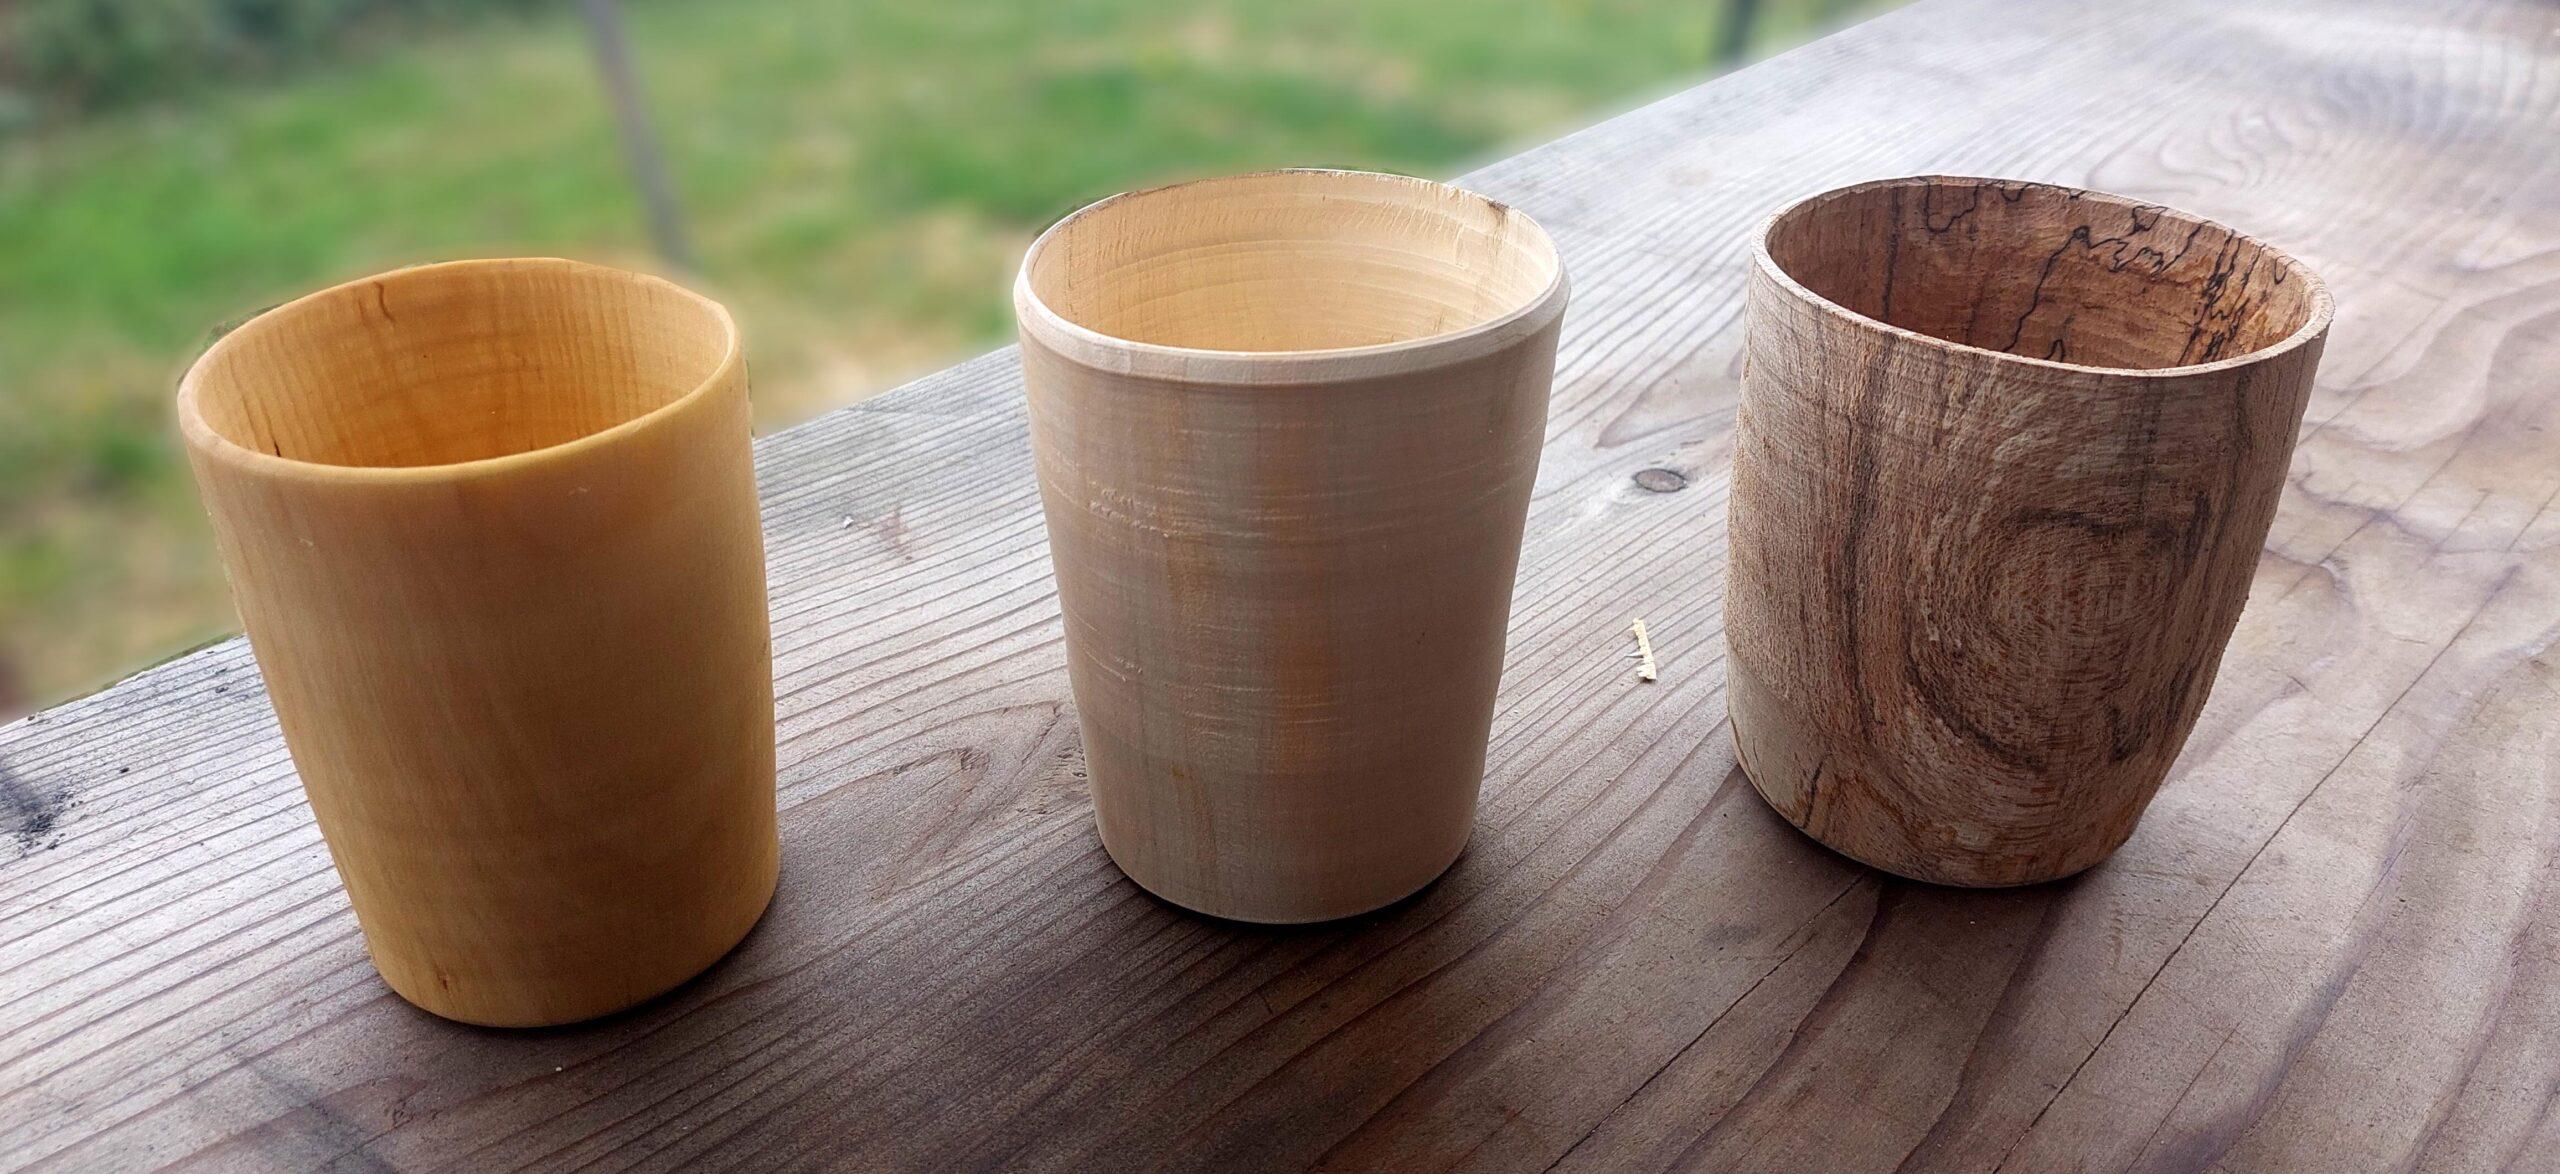
An end grain cup is made from greenwood, and as the name suggests, the cup is made by cutting into the end grain of a log to create a cup. This allows the cup to have very thin walls because the fibres run lengthways along the wall. This means that the cup will naturally flex to a certain extent before breaking.
I was lucky enough to take part in one of Yoav Elkayam’s courses on turning end grain cups held at the Northern Bowl Gathering. The cups we were making are made from birch. It’s fairly simple to axe out a blank for the cup. You are simply splitting off the wood with an axe to end up with a rough cylinder.
This cylinder is then mounted onto the pole-lathe. The first step is to remove the high points. Starting from the right edge of the cylinder and working left to right you simply remove a tool’s width of wood all around the blank. Then you move slightly further along the cylinder and repeat this until the outside of the blank is smooth and closer to a cup shape.
Working the base
On the base of the cup, there are two elements to work on. The first is to work a small foot onto the base so that when the cup is standing there is a slight shadow beneath the edge of the cup. This is to improve the cup’s appearance. The second step is to remove some of the wood from the base so that it is slightly concave. This ensures the cup will stand properly, even if the cup warps slightly in the drying process.
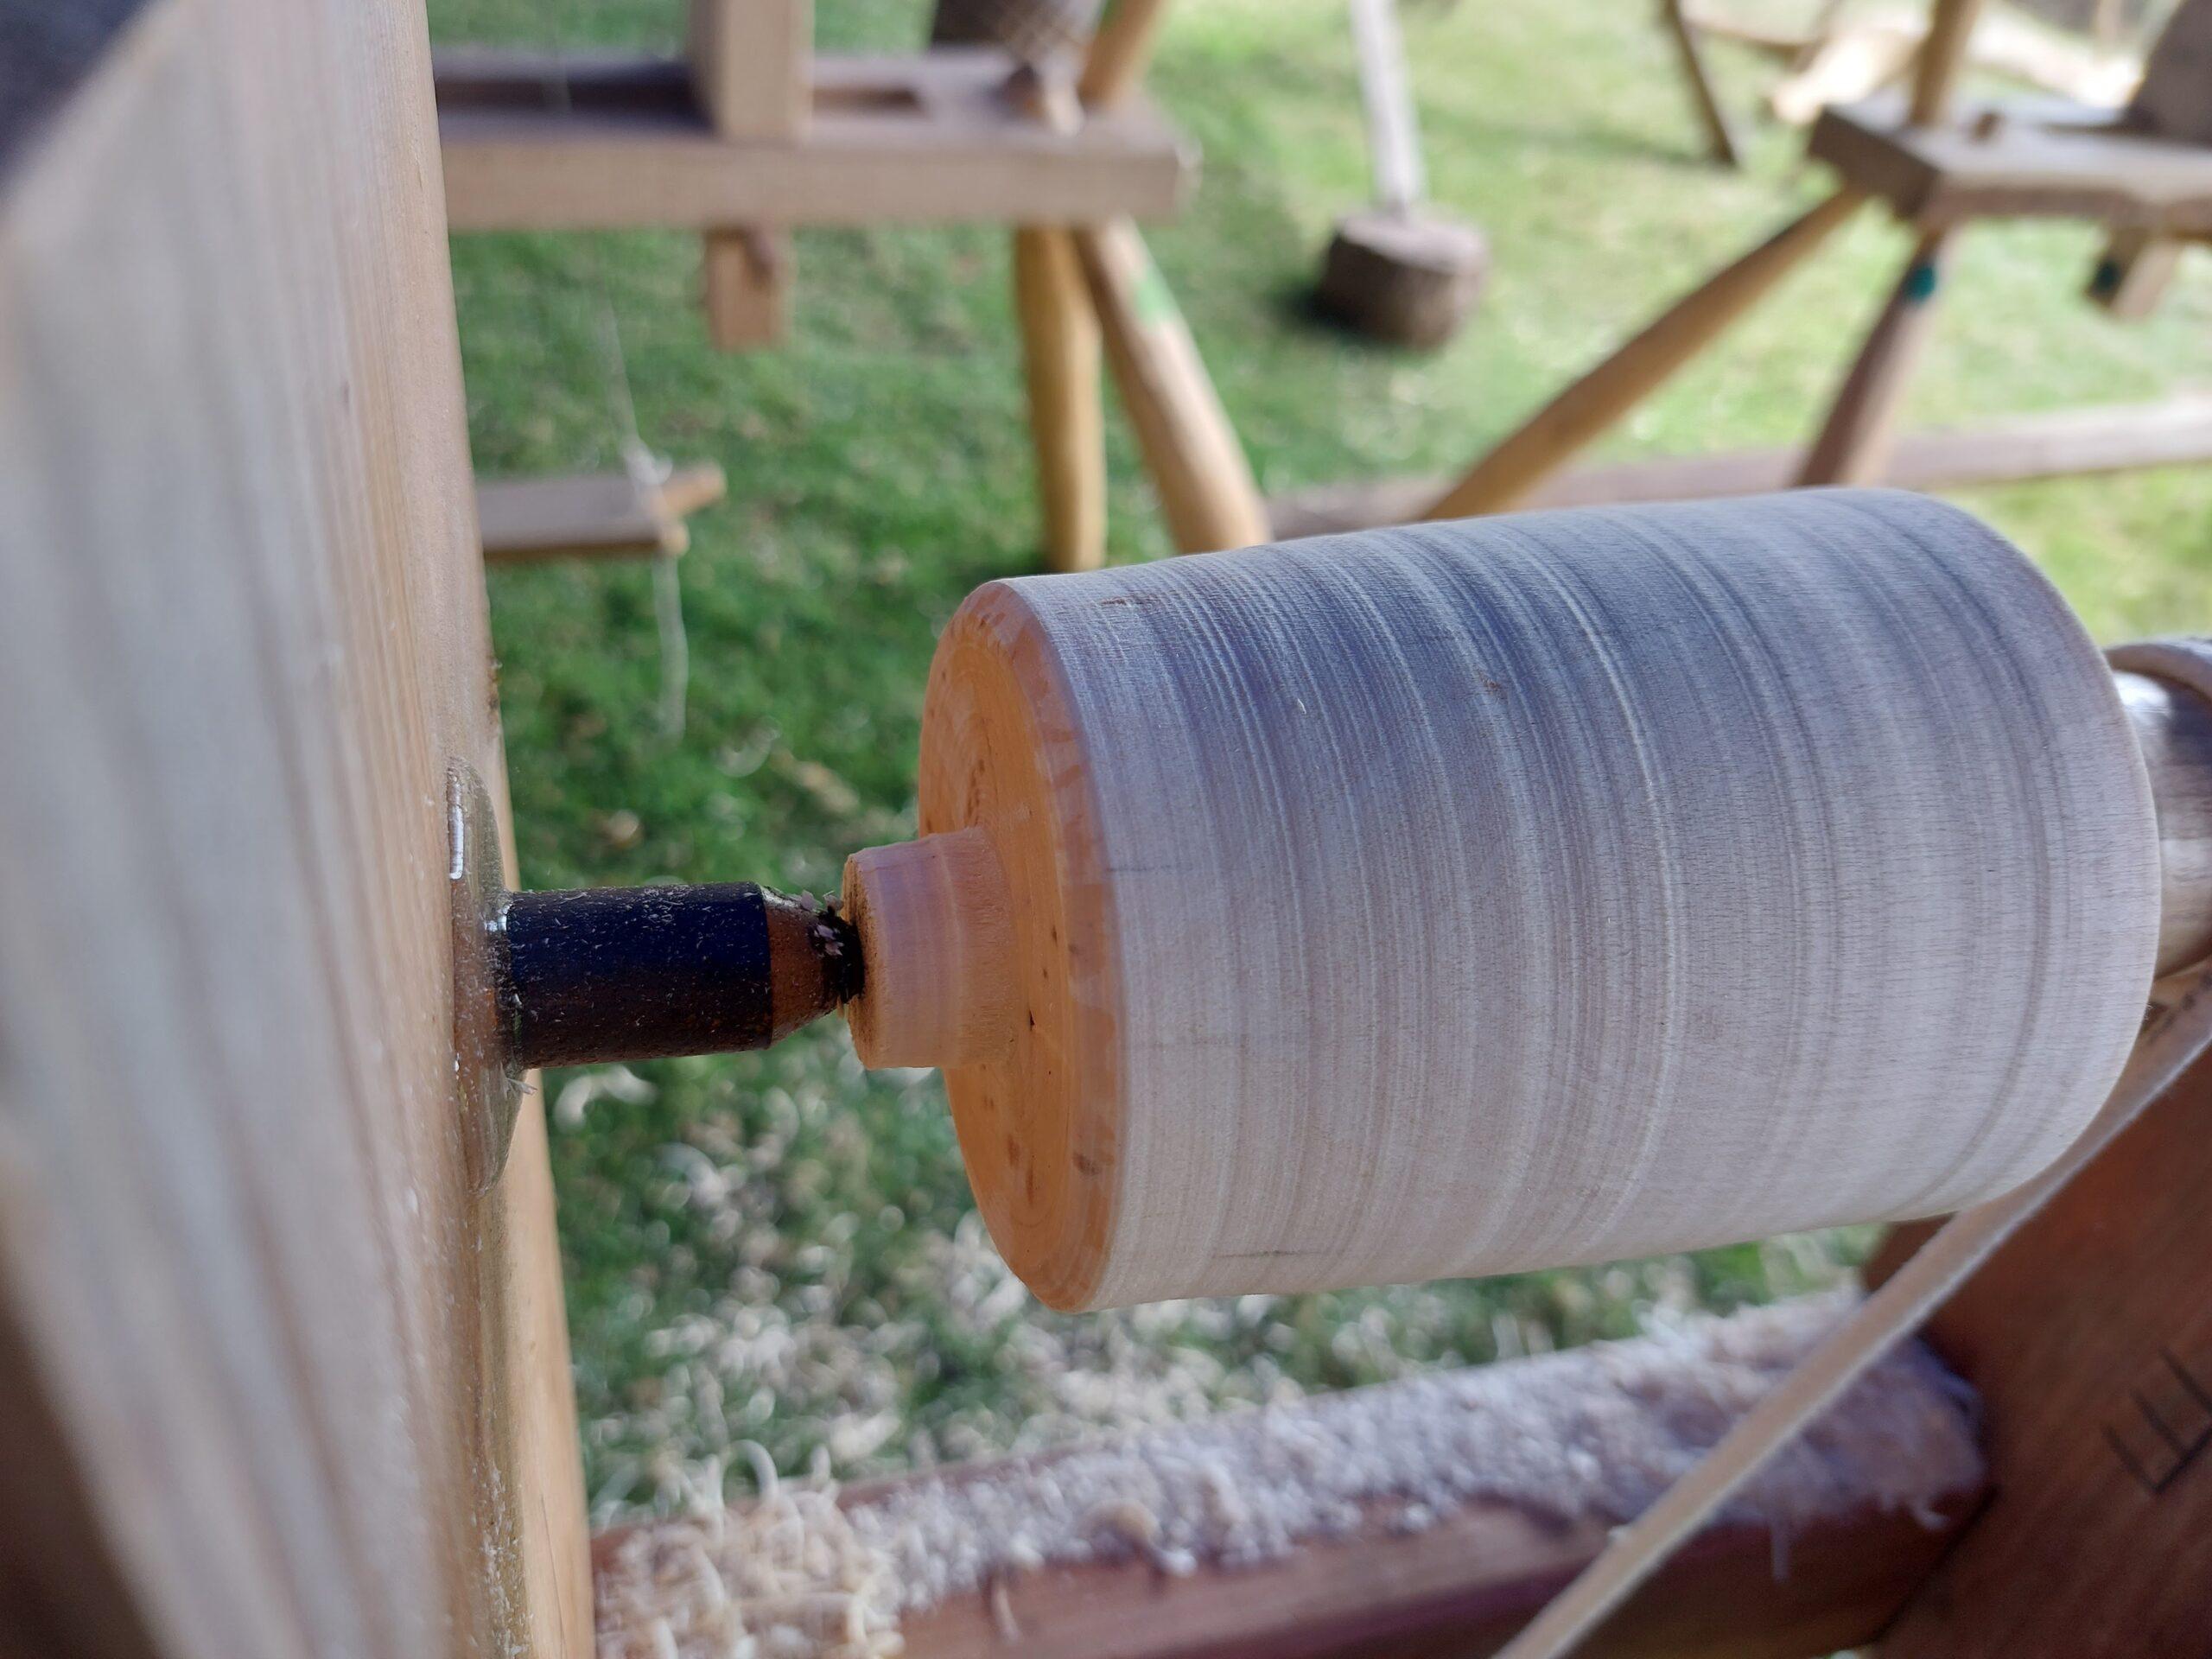
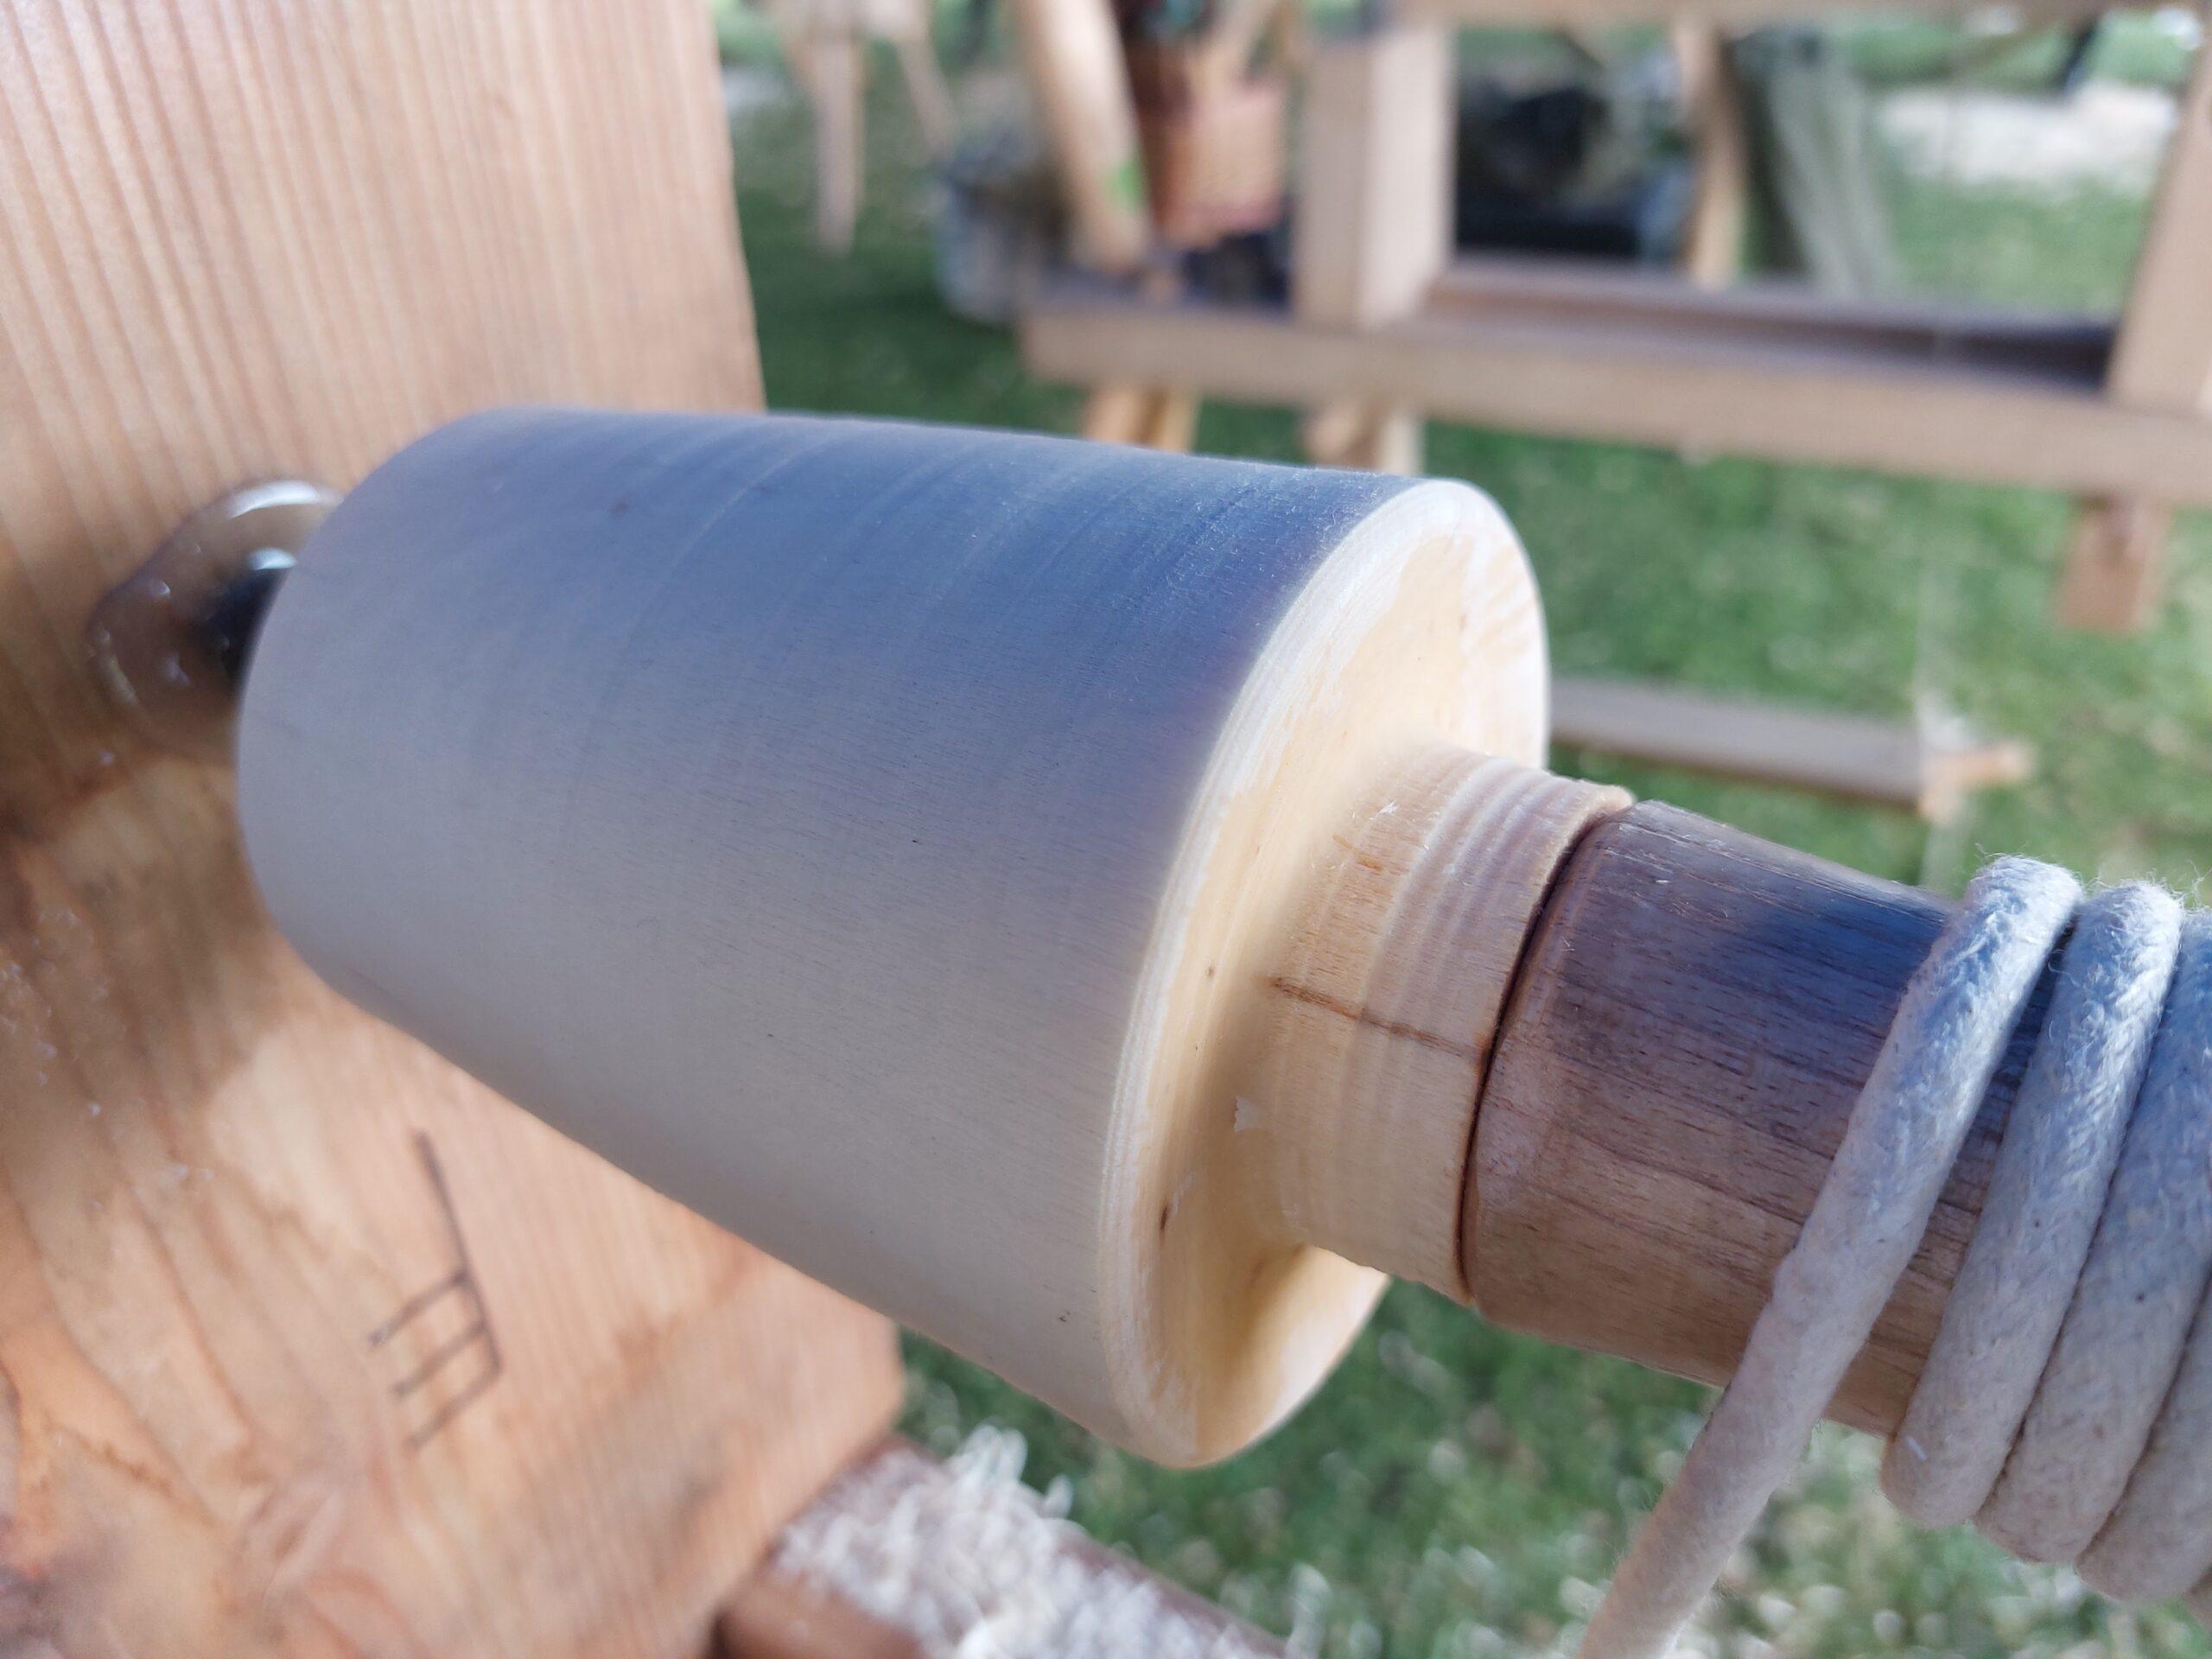
Hollowing out the end grain cup
This is where things get a bit more tricky. The first step can be completed with a tip-up hook, here you reduce the size of the cup to its final height. This creates a clean rim for the cup. Then it’s a case of creating a channel that gets deeper toward the core. The goal is to remove as much wood with a standard hook tool before moving on to the first specialist tool the plunge hook.
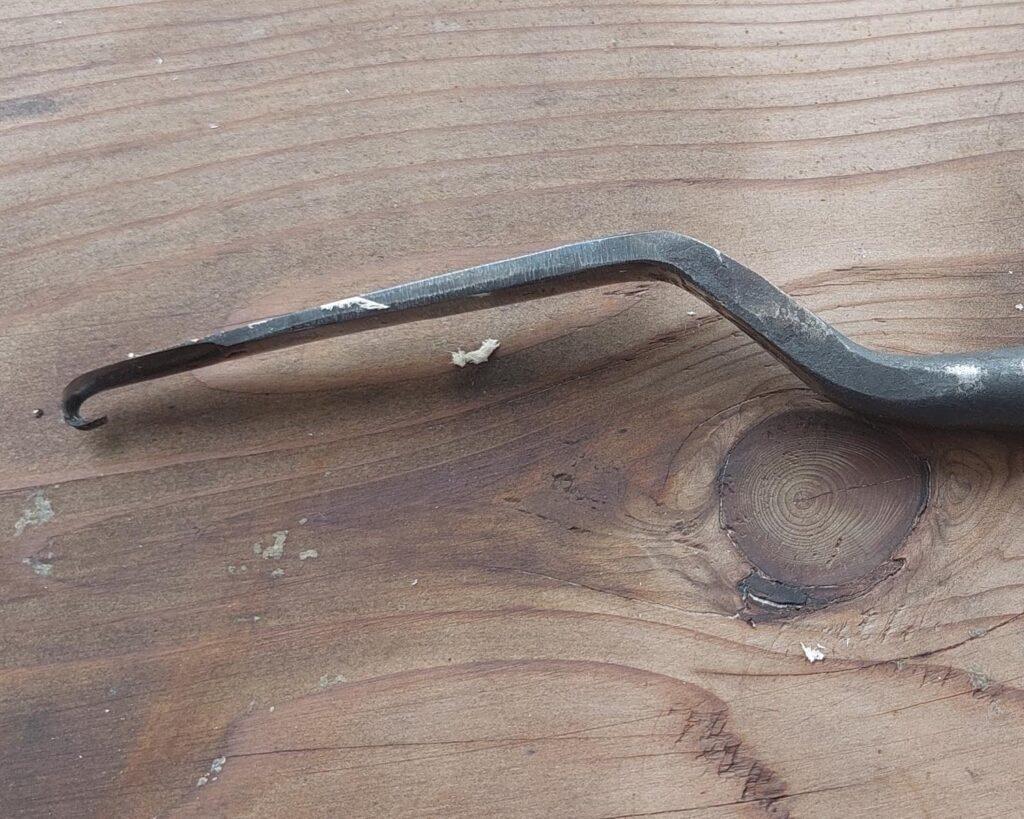
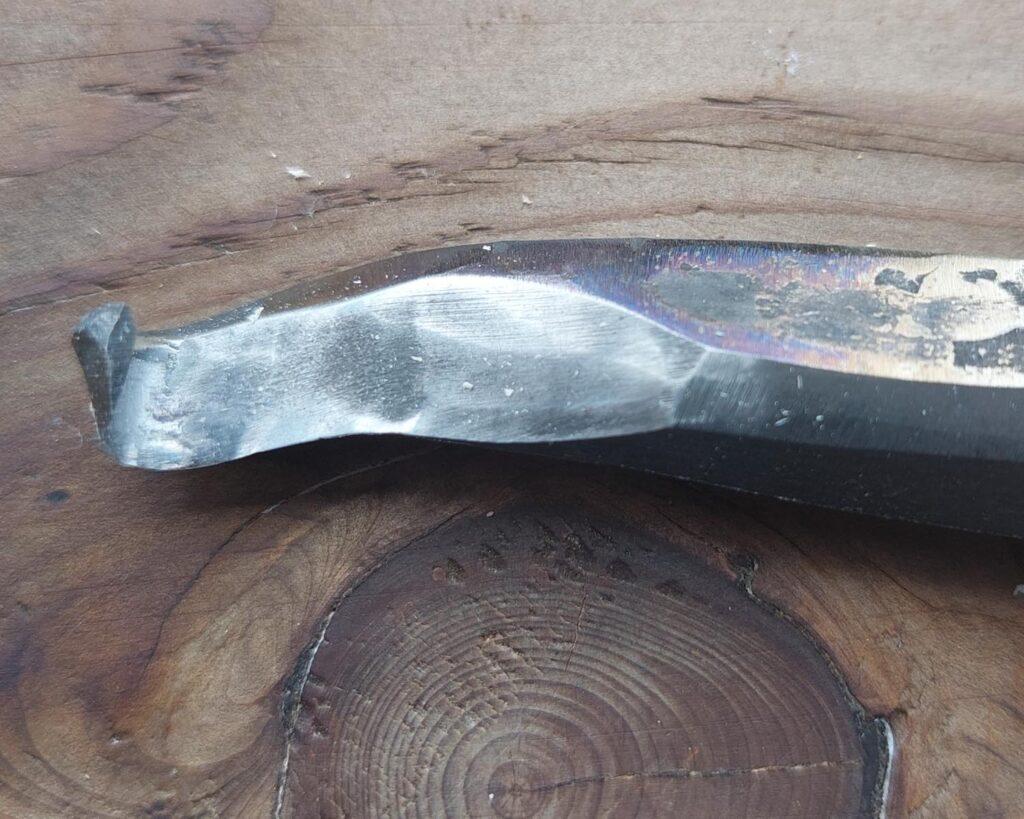
The plunge hook
The job of the plunge hook is to remove waste wood from along the core. The tool is basically a tip-down hook and its purpose is to remove material from the core and the inside base of the cup. The cut on the core is fairly standard and creates ribbon-shaped shavings, however, the material taken from the base is end-grain meaning the waste comes out as a fine powder as you cut the ends of the fibres. It’s quite easy to trap the hook between the core and the inside edge of the cup – therefore you need to be careful not to break the tip of the hook. It’s possible to create a little more space by carefully using the plunge hook to remove material from both the core (don’t go too thin or the core will snap) and the inside face of the cup.
The politician
Now it’s time to use the second specialist tool, the politician, which is a crooked tool (get it? Politician, crooked!?!). You push the politician into the cup as far as it will go. Then using the hook on the inside edge you work on removing material working from the base to the rim of the cup. This is a much more satisfying cut and creates nice ribbons. With practice, it’s possible to take the width of the cup’s sidewall to 2mm, or slightly less. The base is complete when the thickness is between 5 & 8 mm (Yoav has his even thinner). The final task on the lathe is to reduce the thickness of the core until the core no longer holds the cup steady.
Remove the core and clean the base
It’s important not to pull the core too much. Otherwise, you risk pulling out part of the base making the cup useless. Using a small sharp chisel it’s possible to cut the few remaining fibres in the core leaving a small nub. This you can remove with a long-handled hook knife. Now all that is needed is to remove the nub from the outside of the base and you have a polelathe turned wooden cup. The cup has to dry slowly. It’s best to fill the cup with shavings and put it somewhere out of the sun and fairly cool.
Then you can choose to paint or oil the cup. Then hopefully you’ll have a cup that will last a long time. Yoav told me that as long as the wood doesn’t dry out too much and you have a consistent width on the walls and base of the cup it should be ok to use with hot and cold drinks.
Nice blog post 🙂
Thanks